Using and taking care of my own PEG feeding tube wasn’t hard, but I did have a few goofs even though the Dietician explained to me what I needed to do (I was a captive audience during my first chemo session). Here I’ll talk about some tips and some necessary maintenance tasks .
IMPORTANT: there are different types of feeding tubes: some with pumps, some manual, some that go in through the nose, and some that go in through an opening in the abdominal wall. My discussion here pertains only to my experience with my particular PEG tube, which was a manual feeding tube through the abdominal wall. You must follow your own prescribed instructions as set out by your own Gastroenterologist, Oncologist, and/or Dietician.
Since my cancer was already constricting my throat and causing dysphagia, it only made sense that it would worsen and that my ability to swallow would be further restricted due to the side effects of radiation therapy. For this reason, my Oncologist strongly recommended that I get a PEG feeding tube.
I’m glad that I did. My throat closed up so much that even a tiny piece of noodle got stuck during my first chemo session, and later on in my treatments I wouldn’t even be able to swallow liquids. As much as I didn’t really relish the thought of giving up real food, I did take comfort in the fact that I didn’t have to think about what to make for meals any more — I was off the hook and I was too fatigued to care.
Using my PEG feeding tube
The Dietician, Elaine, came to my treatment bed in the chemotherapy ward and proceeded to lay out some paraphernalia on my lap. Based on my protein requirements she determined how many bottles of Ensure I would need to take each day: for my weight I would need seven. We were going to do my first feeding together so that I could see how it was done. What follows now is the step by step procedure that she showed me.
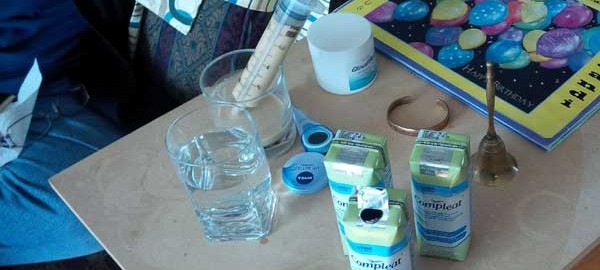
I would need forceps, a glass of clean water (not icy cold nor steaming hot), another clean empty glass, a bottle of my recommended feeding solution, a large syringe, burn netting (or other method for holding the tip up when not in use), and paper towels. For cleaning, I needed distilled water and cotton-tipped swabs.
Step 1. The first thing Elaine did was lay out an absorbent pad on my lap to catch any inadvertent spills. At home, I would soon find out the hard way that there will be LOTS of spills.
Tip: Have plenty of paper towels or absorbent towels nearby.
Step 2. Forceps were used to clamp the tube, even though there’s a stopper tip on it. Failing to do this before proceeding to step 3 is why you need to have a lot of paper towels handy. In the feature image you can see paper towels on the sofa beside the bedside table.
Step 3. The tip of the feeding tube was popped open. If the tube isn’t clamped, then the contents of the tummy will likely spill out. I think Disney calls this a protein spill. Don’t be surprised if it smells awful — don’t forget that the tube goes directly into your stomach so in essence it’s vomit. If you do have a spill, close the stopper, use the paper towels to clean up the mess, and return to step 2.
Step 4. Stick the tip of the large syringe into the clean water, and then pull the plunger to suck up some clean water.
Step 5. Snugly insert the tip of the syringe into the opened tip of the feeding tube, and unclamp the forceps. Slowly depress the plunger. This will squirt the water down the tube and into your belly. The first time I did this I felt a very strange sensation. It was as though my stomach had perceived that it was receiving sustenance but was surprised to see that it wasn’t coming from the esophagus. I soon got used to it. You may also find it a bit awkward, as though you need three hands. My husband Seaghan helped the first few times until I got the hang of it.
Do NOT remove the syringe from the tube until you clamp it again with the forceps. If you forget, then reread step 3. Use more paper towels.
Tip: get used to a lot of clamping, else get used to a lot of messes
Step 6: Give your feeding solution a good shake if the bottle directions say so, then pour it into a clean glass. My syringe wouldn’t fit into the opening of the bottle that my feeding solution came in. Suck some feeding solution up into the large syringe.
Step 7: Repeat step 5, ensuring you don’t forget to unclamp before depressing the plunger, then clamp again before removing the syringe from the tube.
Repeat the above steps as much as necessary to get the required amount of feeding solution into you, as prescribed by your Dietician.
Step 8: Follow your feeding with one last syringe of clean water to flush out the tube. Rinse out your syringe so that it’s clean and ready for your next feeding.
Elaine gave me some burn netting (it looked like a tube top made out of mesh) and instructed me to wear it around my waist so that it would hold the tube and tip upright. The tube was so long that it would simply have dropped down inside one pant leg and then it would be a bother to retrieve for my feeding time so the netting was supposed to keep it in place around my waist. Problem is, the burn netting she gave me wouldn’t open wide enough to wear it. I ended up cutting it up to create a cradle for the feeding tube tip, and then using medical tape to secure the cradle to my skin.
Caring for the feeding tube
Your Dietician will have determined how much solution you need daily, based on your personal protein requirements. Do try your best to feed yourself what’s recommended. I know it’s hard some times, especially when you’re nauseous, but it’s important to keep your energy level up and prevent or reduce weight loss. It’s also very important to provide your body with the protein it needs to heal.
Don’t put anything in your feeding tube that isn’t specifically approved, such as alternative feeding solutions or home-blended solutions. Alternative or home-made solutions may not provide you with adequate protein and caloric needs, and they could also clog your tube.
Always flush your feeding tube at the start and end of each feeding tube in order to avoid any clogs.
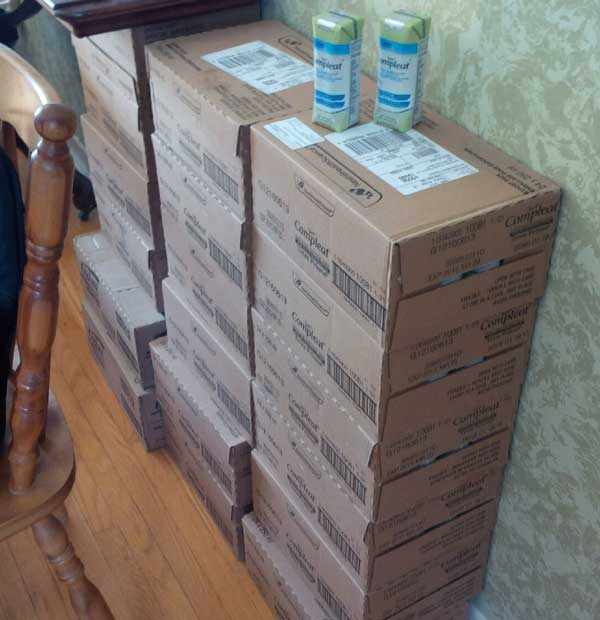
Don’t hesitate to talk to your Dietician if you feel your feeding solution isn’t right for you. There are acceptable alternatives. For me, I found that my originally prescribed feeding solution was too rich and I just couldn’t feed myself the quantity they prescribed, so I was switched to “Compleat”.
I was told that I could shower with my feeding tube, but not bathe. I used Press’n Seal to keep the flange area dry (where the tube goes through the abdominal wall). It actually stuck to the skin very well so it was effective in keeping the water out.
Clean the flange area as instructed. Use a good quality cotton-tipped swab dipped in distilled water to gently clean under and around the flange. If you notice any leakage or signs of infection, see your doctor.
For my feeding tube, the stopper top on the tube could be replaced if I found that it didn’t fit snugly into the tube any more. Sticking the syringe tip into the tube does stretch it over time. I knew mine was ready to be replaced when I was at the cottage and my in-laws asked me why my T-shirt was all wet. I hadn’t noticed that the stopper had popped open and my tummy contents had leaked all over my shirt. Gross. On my next visit to Sunnybrook the Dietician simply clamped the tube, snipped the top of it off, then stuck a new tip onto it. Easy peasy.
I was told that I shouldn’t be alarmed if I had some contents of my stomach in my tube in-between feedings. It will ebb and flow in and out. It’s primarily the reason why I kept my tube tucked inside my pants: didn’t want anybody seeing that.
Accidents do happen. For me they happened a lot. Mostly I’d forget to clamp the tube due to tiredness, chemo brain fog, or whatever else was distracting me and then I’d need to go change because of a spill. One time I accidentally dumped a nearly full bottle of Compleat onto my laptop keyboard. The keys got really gluey and sticky and I ended up taking the keyboard out of my laptop so that I could properly clean it. Cue the paper towels, again.
—Sandi
Next time: Well wishes
Blah. That was tough to read so it must’ve been a doozy to live through. Thank God you’re able to eat again!
That’s a lot to deal with when youre tired! N9 wonder you had a few messes to clean up!
I love that your stock was called “the wine cellar” 🙂